AWS S3 이벤트
AWS S3 이벤트 다뤄보기
S3 Event
우리는 여기서 S3가 생성되면 JSON 형식의 파일을 YAML으로 변경하는 실습을 진행한다. 코드는 AWS 문서를 참고하여 실습을 진행한다.
S3 이벤트 스키마
S3 이벤트의 구조의 자세한 내용은 AWS 문서에서 확인할 수 있다. 아래의 실습 코드에서도 예측할 수 있듯이 Records를 통해 한번 감싸지며, 나머지 키는 아래에서 확인할 수 있다.
1
2
3
4
5
6
7
8
9
10
11
12
13
14
15
16
17
18
19
20
21
22
23
24
25
26
27
28
29
30
31
32
33
34
35
36
37
38
39
40
41
42
43
44
45
{
   "Records":[
      {
         "eventVersion":"2.2",
         "eventSource":"aws:s3",
         "awsRegion":"us-west-2",
         "eventTime":"The time, in ISO-8601 format, for example, 1970-01-01T00:00:00.000Z, when Amazon S3 finished processing the request",
         "eventName":"event-type",
         "userIdentity":{
            "principalId":"Amazon-customer-ID-of-the-user-who-caused-the-event"
         },
         "requestParameters":{
            "sourceIPAddress":"ip-address-where-request-came-from"
         },
         "responseElements":{
            "x-amz-request-id":"Amazon S3 generated request ID",
            "x-amz-id-2":"Amazon S3 host that processed the request"
         },
         "s3":{
            "s3SchemaVersion":"1.0",
            "configurationId":"ID found in the bucket notification configuration",
            "bucket":{
               "name":"bucket-name",
               "ownerIdentity":{
                  "principalId":"Amazon-customer-ID-of-the-bucket-owner"
               },
               "arn":"bucket-ARN"
            },
            "object":{
               "key":"object-key",
               "size":"object-size in bytes",
               "eTag":"object eTag",
               "versionId":"object version if bucket is versioning-enabled, otherwise null",
               "sequencer": "a string representation of a hexadecimal value used to determine event sequence, only used with PUTs and DELETEs"
            }
         },
         "glacierEventData": {
            "restoreEventData": {
               "lifecycleRestorationExpiryTime": "The time, in ISO-8601 format, for example, 1970-01-01T00:00:00.000Z, of Restore Expiry",
               "lifecycleRestoreStorageClass": "Source storage class for restore"
            }
         }
      }
   ]
}
람다 함수 생성
Lambda > 함수 생성을 클릭한다. 새로 작성 옵션으로 람다를 생성하며, 런타임은 Python 3.11로 진행한다. 함수명은 이후에 실습에서도 사용할 것이기에 편의상 JSONtoYAML으로 지어줬다. 함수에 들어가서 AWS 문서에서 있는 샘플 코드를 복사하고 Deploy 버튼을 클릭하여 배포한다.
코드의 내용을 자세히 살펴보자.
S3 이벤트 스키마의 내용을 확인하면 event['Records'][0]['s3']['bucket']['name']를 통해 버킷의 이름을 얻을 수 있다. 이후 유사한 방법으로 키를 얻고, aws sdk(boto3)를 사용하여 s3에 접근하여 객체를 얻어온다.
1
2
3
4
5
6
7
8
9
10
11
12
13
14
15
16
17
18
19
20
21
22
23
24
25
import json
import urllib.parse
import boto3

print('Loading function')

s3 = boto3.client('s3')


def lambda_handler(event, context):
    #print("Received event: " + json.dumps(event, indent=2))

    # Get the object from the event and show its content type
    bucket = event['Records'][0]['s3']['bucket']['name']
    key = urllib.parse.unquote_plus(event['Records'][0]['s3']['object']['key'], encoding='utf-8')
    try:
        response = s3.get_object(Bucket=bucket, Key=key)
        print("CONTENT TYPE: " + response['ContentType'])
        return response['ContentType']
    except Exception as e:
        print(e)
        print('Error getting object {} from bucket {}. Make sure they exist and your bucket is in the same region as this function.'.format(key, bucket))
        raise e
이벤트 생성
Buckets > Properties > Event 경로에서 이벤트 알림을 생성한다.
이벤트 이름은 JSONtoYAML으로 지어줬고, 접미사에 .json을 입력하여 json 형식의 파일이 생성될 때만 이벤트 알림이 생성되도록 한다. 이벤트 유형으로는 s3:ObjectCreated:* 을 체크한다. 이후 대상에 Lambda 함수를 선택하고 위에서 생성한 Lambda 함수를 선택한다.

람다에 권한 부여
람다 > 함수 > 구성 > 권한에 들어가면 함수가 가지고 있는 IAM 역할을 볼 수 있다. 해당 역할을 클릭하고 아래의 인라인 정책을 추가한다. 혹은 “AmazonS3FullAccess” 정책을 붙여도 무방하다.
위의 실습코드에서는 “s3:GetObject” 권한만 있어도 충분하지만, 아래에서 이어질 실습에서 S3에 객체를 생성하기에 “s3:PutObject” 권한까지 추가한다.
1
2
3
4
5
6
7
8
9
10
11
12
13
14
{
    "Version": "2012-10-17",
    "Statement": [
        {
            "Effect": "Allow",
            "Action": [
                "s3:GetObject",
                "s3:PutObject"
            ],
            "Resource": "arn:aws:s3:::*/*"
        }
    ]
}
실행 결과 1
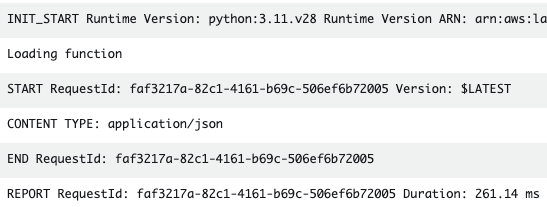
이제 test.json 파일을 S3에 업로드한다. 람다의 실행결과는 CloudWatch Log를 통해서 확인할 수 있다. 정상적으로 Content Type이 출력된다.
코드 수정
이제 코드를 수정하여, JSON 파일이 들어오면 이를 YAML 형식으로 변경하는 함수를 작성한다.
기존의 Content Type을 출력하는 코드를 제거하고 yaml 프레임워크를 통해 JSON 파일을 YAML 형식으로 변경하는 코드만 추가한다. 아래에서 #S3 버킷에서 객체 가져오기 주석 아랫부분에 해당한다. 파일 형식을 변환하고 .yaml 으로 업로드하면 끝이다.
코드 작업을 마무리하면 JSON 파일이 오면 YAML 형식으로 변환하여 .yaml 파일을 업로드하는 람다함수가 완성된다.
1
2
3
4
5
6
7
8
9
10
11
12
13
14
15
16
17
18
19
20
21
22
23
24
25
26
27
28
29
30
31
32
33
34
35
36
37
38
import json
import boto3
import yaml
import urllib.parse

print('Loading function')

# Boto3 S3 클라이언트 초기화
s3 = boto3.client('s3')

def lambda_handler(event, context):
    # 이벤트에서 S3 버킷 이름과 객체 키 추출
    bucket = event['Records'][0]['s3']['bucket']['name']
    key = urllib.parse.unquote_plus(event['Records'][0]['s3']['object']['key'], encoding='utf-8')

    try:
        # S3 버킷에서 객체 가져오기
        response = s3.get_object(Bucket=bucket, Key=key)
        json_content = response['Body'].read().decode('utf-8')
        # JSON 내용을 Python 객체로 변환
        json_data = json.loads(json_content)

        # Python 객체를 YAML 형식의 문자열로 변환
        yaml_content = yaml.dump(json_data, allow_unicode=True)

        # YAML 문자열을 S3 버킷에 저장하기 위한 새 키 생성
        yaml_key = key.rsplit('.', 1)[0] + '.yaml'

        # 변환된 YAML 내용을 S3 버킷에 저장
        s3.put_object(Bucket=bucket, Key=yaml_key, Body=yaml_content, ContentType='application/x-yaml')
        print(f'Successfully converted {key} to YAML and uploaded as {yaml_key}')

        return f'Successfully converted to YAML and uploaded as {yaml_key}'
    except Exception as e:
        print(e)
        print('Error processing object {} from bucket {}. Make sure they exist and your bucket is in the same region as this function.'.format(key, bucket))
        raise e
우리는 위에서 yaml 프레임워크를 사용한다. 람다에서는 JSON, Boto3, urllib.parse 프레임워크는 기본적으로 포함하고 있으나 pyyaml은 아니기에 직접 의존성을 포함하여 업로드 해야한다.
python 코드가 있는 공간에 아래의 명령어를 실행한다.
1
pip install pyyaml -t .
이후 ZIP 파일로 압축한다.
1
zip -r jsontoyaml .
명령어 실행결과는 아래와 같으며, zip 파일을 람다에 올리면 된다.
1
2
3
ls
PyYAML-6.0.1.dist-info jsontoyaml.zip         yaml
_yaml                  lambda_function.py
실행결과2
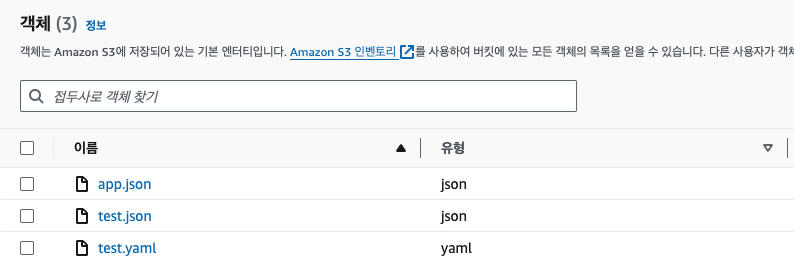
test.json 파일을 삭제한 후 다시 업로드를 하면 아래의 그림과 같이 yaml 파일도 추가된 것을 확인할 수 있다. 시간을 확인하면 JSON 파일이 업로드된 후 30초 후 YAML 파일이 생성되었다. 이제 구체적인 내용은 CloudWatch의 Log를 통해 확인한다.
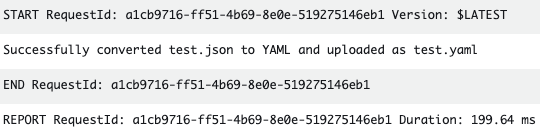
CloudWatch에 접속하여 최근의 로그 스트림을 확인해보면 아래와 같이 Succesfully Log를 확인할 수 있다.
S3는 용량이 큰 객체를 담는 저장소로 이미지, 영상 등이 주로 사용된다고 한다. 이미지를 업로드할 때 위의 실습과 같이 람다를 통해 썸네일을 생성하는 이미지를 제작하는 등 다양하게 사용될 것 같다.